


Loft hatches: Installation, Insulation, and Operation
Whether you’re converting your loft, looking to increase storage room, or even building your own home from scratch, knowing where to start when it comes to loft hatch installation can be difficult. To help, we’ve put together this comprehensive guide on loft hatches. Here, we'll cover everything you need to know about installing, insulating, and operating your loft hatch and ladder. So, if you're looking to improve energy efficiency or simply make accessing your loft easier, we've got you covered. We’ll discuss:

A loft hatch is an access point to the attic or loft space in a building. It provides entry to the loft for storage, maintenance, or other purposes, usually via a loft ladder. Here are some common types of loft hatches:
- Standard loft hatch: This is a simple hatch that typically consists of a square or rectangular opening in the ceiling with a removable cover.
- Drop-down loft hatch: These hatches are hinged at one side and can be lowered down, providing a larger opening for easier access to the loft space. They often come with a ladder attached for convenient entry.
- Hinged loft hatch: Similar to drop-down hatches, hinged loft hatches are attached to one side of the opening and can be swung open like a door. They are available in various sizes to fit different ceiling openings.
- Electric loft hatch: These hatches are operated electronically, usually by a remote control, making it easier to open and close them — especially for those with limited mobility.
Here’s a step-by-step guide on how to install a loft hatch. For seamless access to your loft space, you can refer to our loft ladder installation guide. This will provide you with the necessary steps and tips for installing a loft ladder, complementing your newly installed loft hatch. Make sure that you have the required loft hatch accessories at the time of installation. For best results, you may wish to hire a builder to complete these projects.
Tools and materials required:
- Tape measure
- Pencil
- Drill
- Saw (hand saw or jigsaw)
- Screwdriver
- Screws
- Insulation material (e.g., rigid foam board)
- Loft hatch materials, including hatch, frame, hinges, loft ladder installation brackets, and linings
- Installation guide
Step 1: Measure and mark the opening
- Use a tape measure to determine the desired size of the loft hatch opening on the ceiling.
- Measure the opening carefully to ensure the loft hatch fits properly.
- Mark the outline of the opening on the ceiling using a pencil.
Step 2: Cut the opening
- Drill a hole in one corner of the marked outline.
- Use a saw to carefully cut along the marked lines, creating the opening for the loft hatch.
Step 3: Install the frame
- Place the frame of the loft hatch into the opening, ensuring it fits snugly.
- Double-check the alignment of the frame before securing it in place.
- Use screws to secure the frame to the ceiling joists.
Step 4: Attach the hatch
- Attach the hinges to the loft hatch according to the manufacturer’s instructions.
- Position the hatch within the frame and attach it to the hinges securely.
Step 5: Secure the hatch
- Check that the loft hatch opens and closes smoothly.
- Use screws to secure any loose areas and ensure a tight fit.
- Use insulation material to fill any gaps around the edges of the hatch to prevent draughts.
To make a loft hatch bigger, you must remove the existing hatch and then follow the steps above to expand the opening and install a new frame.
Insulating the loft hatch is crucial for several reasons including energy efficiency. Without proper insulation, warm air can escape through the loft hatch opening, especially during colder months. This can lead to increased heating costs as your central heating or HVAC system works harder to maintain a comfortable temperature indoors.
Using an LWK wooden loft ladder with proper insulation helps to reduce heat loss, resulting in lower energy consumption and reduced carbon emissions, making your home more environmentally friendly. Proper insulation around the loft hatch helps to maintain a consistent temperature throughout the building, enhancing comfort for the occupants.
Insulating the loft hatch can also help prevent condensation buildup in the attic space, which can lead to dampness, mould growth, and structural damage over time. It also helps maintain indoor air quality by preventing dust, pollutants, and allergens from entering the living spaces.
To insulate a loft hatch, you can use various materials such as insulation boards, foam strips, or flexible insulation. Here’s a step-by-step guide for insulating a hinged loft hatch or drop-down loft hatch:
Step 1: Measure and prepare
- Measure the dimensions of the loft hatch opening to determine the amount of insulation material needed.
- Clean the area around the hatch to ensure it’s free from dust and debris.
Step 2: Choose insulation material
- Select the appropriate insulation material based on the size of the gaps around the hatch and personal preference. Options include rigid insulation boards, foam strips, or flexible insulation.
Step 3: Install insulation
- Cut the insulation material to fit around the edges of the loft hatch opening.
- Apply adhesive or use screws to secure the insulation in place depending on the material, ensuring a snug fit to prevent air leakage.
Step 4: Seal any gaps
- Use caulk or expanding foam to seal any gaps or cracks around the edges of the hatch and between the insulation material and the ceiling.
Step 5: Test and adjust
- Open and close the loft hatch to ensure it operates smoothly without any obstruction from the insulation.
- Make any necessary adjustments to ensure a tight seal.
By properly insulating the loft hatch, you can enhance energy efficiency, improve comfort, and reduce heating and cooling costs in your home. If condensation forms on the insulation material, it could lead to mould growth and structural damage so ensure proper ventilation in the loft space to reduce humidity levels. Avoid compressing the insulation material, as this reduces its effectiveness. Instead, use the appropriate thickness of insulation to fill any gaps without compressing it. Seal any gaps or cracks around the loft hatch with caulk or expanding foam to prevent air leakage and further improve energy efficiency. For more tips on how to keep your loft warm in winter and cool in summer, be sure to read our guide.
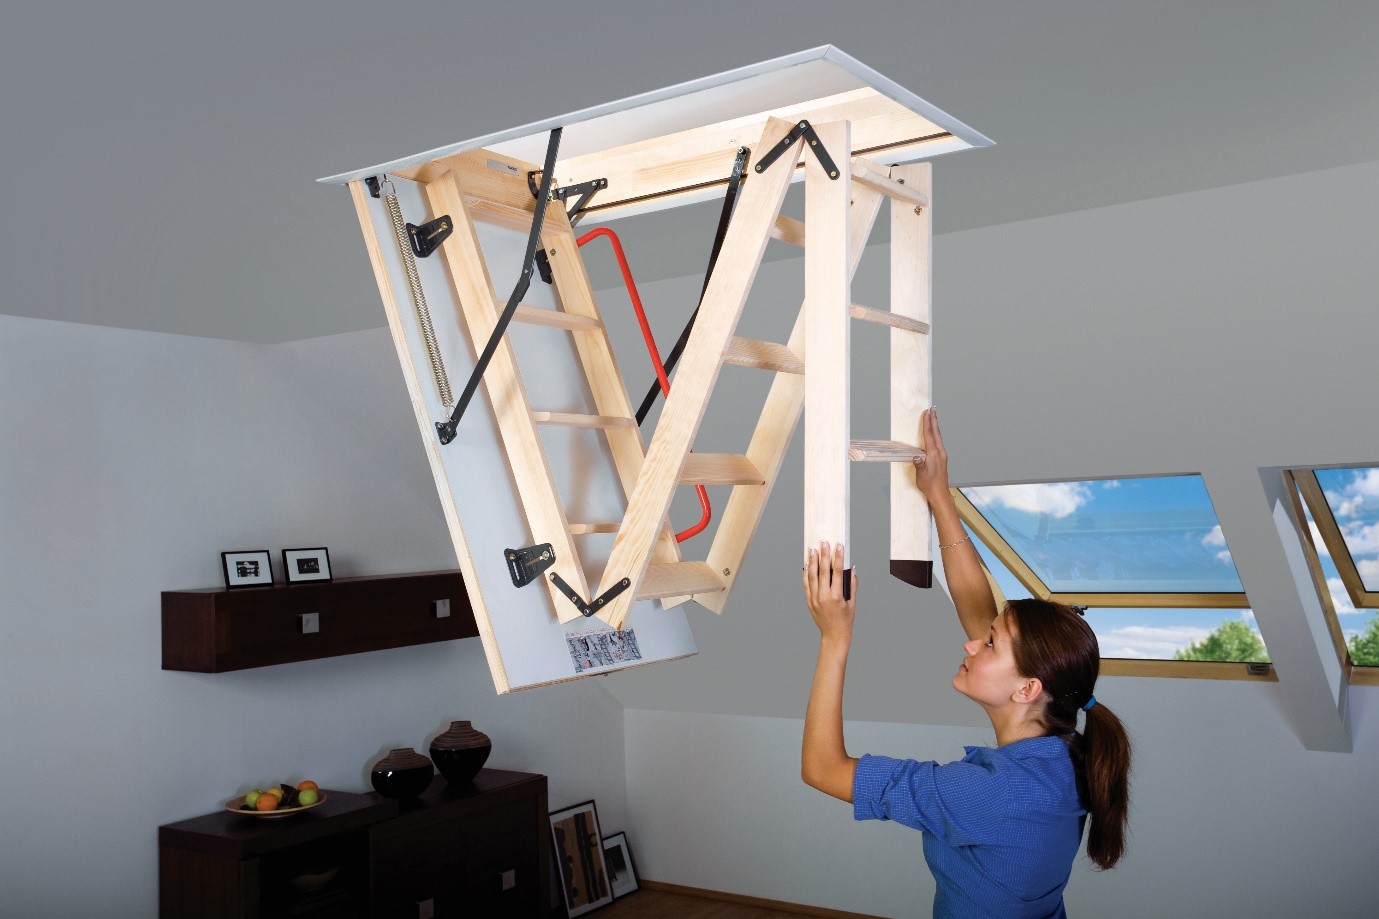
Once your hatch is fitted, it’s important you understand how to use it properly. Here’s a guide on how to open and close a loft hatch safely, use a pole to access it if it’s out of reach, maintain hinges and locks, and seal and weatherproof the hatch:
Opening and closing safely
- Before opening the loft hatch, ensure there are no obstructions or objects directly underneath it.
- Use a secure ladder or step stool to reach the loft hatch safely.
- When opening the hatch, do so slowly and carefully to avoid hitting objects or causing injury.
- Hold onto the hatch securely while opening and closing it to prevent accidents.
Using a pole
- If the loft hatch is out of reach, use a specially designed loft hatch pole or a sturdy object with a hook attachment.
- Attach the hook to the hatch handle or latch and gently pull to open it.
- Make sure the pole is long enough to reach the hatch comfortably without stretching or overreaching.
Once completed, be sure to perform regular maintenance checks on the loft hatch to ensure it remains in good working condition. Clean the hatch and surrounding area to remove dust, dirt, and debris that could affect its operation, and check all hinges, locks, and sealing mechanisms periodically to address any issues promptly, preventing further damage. Lubricate the hinges as needed with a suitable lubricant to ensure smooth operation, and tighten any loose screws or bolts on the hinges and locks to prevent them from becoming loose over time.
You may also wish to inspect the edges of the loft hatch for gaps or cracks that could allow draughts or moisture to enter the living space. Use weatherstripping or foam tape to seal any gaps between the hatch frame and the ceiling, and apply a bead of silicone sealant around the perimeter of the hatch frame to create a watertight seal and prevent leaks.
Congratulations! You’re now equipped with the knowledge to install, insulate, and operate your loft hatch like a pro. Remember, a well-maintained loft hatch not only enhances accessibility but also contributes to energy efficiency and comfort in your home. Be sure to check out our other loft-related guides for more tips and inspiration, including can I convert my loft? and how much does a loft conversion cost?
Related case studies

Don’t move, improve: Do you need planning permission for a loft conversion?

Do you need planning permission for skylights and roof windows?
